Posts tagged cuisine

You can’t win ’em all

So Little RuRu, being 9 months old, is eating solid foods.

One of his favourite treats is applesauce, especially applesauce with blueberries pureed into it.

I had been buying those little pre-packaged pots of unsweetened applesauce, since they are pretty cheap, easily portable and a reasonable size.  One day, Mister decided that he could do better.  “Don’t buy anymore of those applesauce things,” he said.  “I’m going to make my own.  It’ll be better”.

We went to the store and bought a bunch of apples and some apple juice.  One night while I was out, the magic happened.  I came back from wherever I’d been to Mister in the kitchen.  He immediately brought me a spoonful to taste, and proudly proclaimed “No sugar added!”  It was, I have to admit, a pretty tasty applesauce.

A day or so later (we were all sick, including the baby, and didn’t eat solids for a time) while Mister was at work, I decided to try RuRu with Daddy’s Applesauce: Made with Love.  I settled him in his highchair and put a little bit in a bowl.  Once he saw the bowl, he realized food was coming and started to get excited!

I offered him a spoonful.  He took it.  I waited expectantly for his laugh of delight from this delicious treat…. but instead was greeted with…

I missed the gag... but I caught this

He didn’t like it.  I tried again.  Maybe it was just because it was a new flavour.  This time I got…

No! Not that!

I’ve offered it time and time again, and it doesn’t get any better.  He’d rather have the commercial, packaged stuff than the fruits of our labour.  I’m not going to give up, I’ll keep offering. Eventually I’ll wear him down.

I hope.

Comments (5) »

The Cheese Stands Alone

First off, my apologies for my long absence from the blogosphere.  My son is learning to walk and takes a lot of my time.  Then, to top it off, the whole family came down with a stomach flu.  It was a quick flu, really, but it left me feeling weak for a couple days.  I spent a lot of time sleeping.

Today I shall chronicle our latest foray into condo homesteading – microwave mozzarella.  Clearly, cheesemaking is a skill I’ll need when I have goats/cows/sheep and need something to do with all that milk.

We’ve tried this recipe before, with some success.  Mister and I decided to give it another go, because there was definitely room for improvement.

The ingredients are pretty simple: 4L of milk, citric acid, rennet, and salt.
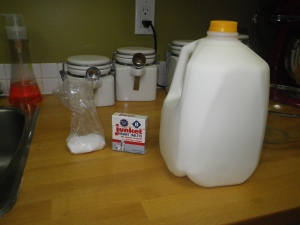
I forgot to put the salt in the photo. Imagine it's there next to the citric acid (the white stuff on the left)

Equipment is also pretty simple:  A thermometer, a microwavable bowl, and a big ol’ stainless steel pot.

To start off with, we brought the milk up to room temperature (we heated it on the stove, but you can also leave it on the counter for an hour or so).  When it was warm enough, we added the citric acid (we used 1 teaspoon dissolved in a little bit of water).  A gentle stir, and it started to curdle immediately.  We were thrilled!

Curds

Almost ready for rennet!

Next, we heated the milk to 90 degrees F (I got the recipe from an American magazine and haven’t bothered to do the conversions… sorry fellow Canucks).  Then, added the rennet (also dissolved in a small amount of water).  We used junkett rennet, because we couldn’t find cheesemaker’s rennet.  Even junkett rennet was darn hard to find.  Junkett rennet isn’t as good, so you need to use a little more.  The recipe called for 1/2 tablet, but we used a whole tablet.

The rennet is dissolved in water so that it distributes evenly

Once the rennet was incorporated, we continued heating to 105 degrees F.  At this point we turned off the heat and waited.  There was definitely a large curd at the top, but the whey was still pretty milky (it’s supposed to be clear and yellowish).  The recipe said if the whey was still milky, wait a while and it will clear up.  When this happened last time, Mister got impatient and added more citric acid and rennet (I couldn’t really blame him, we were on a schedule.  I’m not sure why we decided to make cheese when we had somewhere else to be later).  This time when it happened again, he went straight there.  I think the problem might be a little too much milk, since 4L is about a cup more than the gallon that the recipe called for.  Either way, it worked to clear up the whey, although the curd was no longer a nice shape and it was hard to tell whether it pulled away from the side of the pot (which is supposed to indicate its coagulated goodness).

Attempting to pull the curd away from the side of the pot. It's pretty mangled.

At this point, we drained the curds and put them in the microwavable bowl.  This time, we drained them through cheesecloth.  We regretted this decision, though, as it meant a lot of curds were lost in the transfer (a lot of chemists would cringe at the percent yield we got back because so much stuck to that darn cheesecloth!).  Last time we just drained them by squeezing them by hand in the bowl.
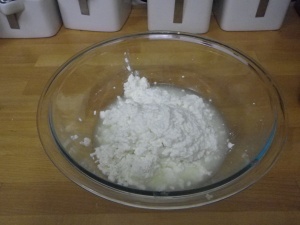
What's left of our curds

Okay.  So now comes the microwave part, since I’m sure you’re all wondering why the microwave factors into this.  Mozzarella is a stringy, stretchy cheese.  In order to get it that way, you need heat.   You can dunk it in a bath of boiling hot water… or you can microwave it.  We chose microwaving.

The idea was to microwave it for several short bursts, and knead it gently in between.  However, it’s darn hard to knead hot cheese curds gently.  Mister did his best, since his hands are made of asbestos, but I think we were lacking in the kneading department.

Kneading with a ...spork? A spoon would be a better option

After heating and kneading and heating and kneading, we added salt, then heated and kneaded again.  On the last knead, you’re supposed to pull the cheese like it’s taffy.  Ours didn’t pull very well, it broke.  This was supposed to indicate it was too cold.  So we heated again.  Then it was too hot to handle.

Next time we’ll buy gloves.

Mister decided he’d had enough of this game, and crammed the cheese into molds.
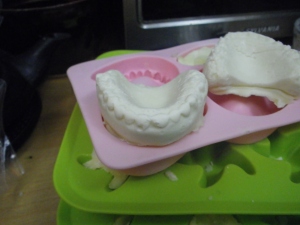
Smile! Cheese dentures.

When it cooled, we tried it.  It’s a tiny bit too salty (last time we under salted, this time we added more to compensate, but it was apparently too much) and the texture isn’t quite what I wanted.  However, it will still be useful for something.  I popped it in the freezer and will use it for French onion soup or something else where the texture isn’t critical.

A fun adventure, even if not the most successful one.  We’ll try again later and hopefully it will work out better!

Comments (6) »

Further Adventures in Yogurt

Well.  I really had intended on getting to this post MUCH, MUCH sooner.  It doesn’t take 3 days to make yogurt.  My yogurt was ready when I awoke the next morning.  I have sampled it and will give you a review shortly.

The reason that this post is so heinously delayed is that since my last post, made upon the evening of yogurt-making, my son has learned to both crawl and pull himself up.  Now, I’m mighty proud of his accomplishments, but it means he can now reach things he couldn’t before.  I have to baby-proof in a hurry, and in the meantime I’m running around after him making sure he doesn’t eat something he shouldn’t or slam his fingers in a drawer or something.

I can pull myself up!

To top that off, last night Mister left for sunny Florida.  He’s escorting his grandmother down, and will return in the wee small hours of the morning on Tuesday, but in the meantime I’m a single parent.

That aside, on to the yogurt!

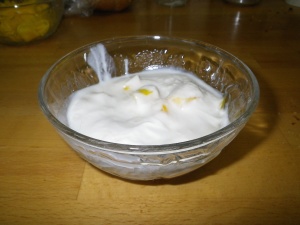
I’m actually pretty pleased with my first attempt at yogurt-making.  It’s not nearly as thick as the starter yogurt, but that has to do largely with the fat content.  The yogurt I used for a starter had a fat content of around 10%, compared to the paltry 3% in my yogurt.

The little pots of yogurt look exactly the same as when I poured the pre-yogurt in, except the yogurt has thickened.  Somehow I expected them to expand or something.

The yogurt tastes a lot cleaner than yogurt bought in the store.  It doesn’t leave that film on your tongue – I hate that feeling, and find yogurt entirely unpalatable in the mornings due to it.  Later in the day I can eat it just fine.  I’d imagine that the reason that film exists is because a lot of commercial yogurt has carageenan (a seaweed extract) added to it to thicken it up some.  The flavour is zingy, but not sour, and the vanilla really has mellowed out.

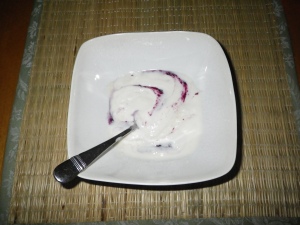
Delicious with home-made blueberry jam!

Also pairs well with mango

I still have a few more pots of yogurt left, but when I’ve eaten them all up I’m going to attempt another batch.  This time I think I might add a bit of cream and maybe some powdered milk to try to thicken it up some.  I might let it incubate a bit longer, too.  Mister got impatient and ate some before the recommended 10 hours was up, and the 2 hours really made a big difference in the consistency.

Definitely worth the effort, though (if you’re into yogurt!)

Comments (2) »

Wake me up before you Yo-yo!

I know, that was awful.  But I had to do it.  And by yo-yo, I of course mean yogurt.

When we got married, Mister and I received a yogurt maker as a gift.

I asked for the yogurt maker – it wasn’t an ill-conceived gift by some dotty relative.  I wanted that yogurt maker because it was part of my grand scheme.  I pictured myself milking my dairy goats, or perhaps my Jersey cows, and making lovely yogurt (or goat-gurt) with the abundant milk they supplied me (along with rustic cheeses, but that’s another story for another day).  The yogurt would be so plentiful, I could supply all my friends and family with the tangy white goo.  Oh, how healthy and happy we would be!

Fast forward two years to today.   We’ve discussed that my projects are not always timely, so it shouldn’t come as a surprise that today was the day we finally christened the yogurt maker.

Enclosed in the box was a little instruction booklet, complete with recipes for various yogurts, goat-gurt, and fro-yo.  After flipping through the recipes, we decided to make vanilla yogurt. Yogurt isn’t really very complicated, so we thought we could probably handle this advanced yogurt (read: regular yogurt that you added honey and vanilla to before incubation).

Materials needed: 4 3/4 cups of milk, 1/2 cup live yogurt, 3 tablespoons honey, 2 tablespoons vanilla, appropriate measuring devices, containment vessels and a warm place to let your yogurt yogify.

My yogurt-making paraphernalia

The recipe called for 2% milk and powdered milk, but having read the instruction booklet I declared myself an expert on yogurt and changed it.  I bought homogenized milk and no powdered milk.  We also used a very high fat vanilla Greek yogurt as our starter, since it’s our favourite yogurt (I love creamy dairy) and we had it on hand.  You can buy yogurt starter from health food stores, which apparently makes a stronger starter culture than store-bought yogurt.  I didn’t want to buy more things, and I wasn’t really concerned with whether or not this yogurt would last a second batch.  Mister and I tend to develop food trends – we’ll decide we like something and eat it constantly until we get tired of it, then we take a break for a while.  Sometimes the trends are cyclical.  Either way, I didn’t want to buy a whole bunch of yogurt starter that would sit in my cupboard when we dropped the yogurt trend.

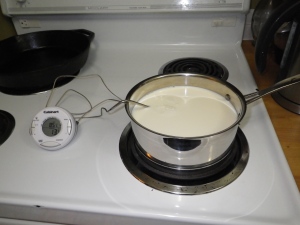
So, moving on to the actual making of the yogurt.  All in all, a simple process.  Start by warming the milk.  It has to be at least room temperature, but heating it to a higher temperature will result in a thicker yogurt.  Aim for 85 degrees Celsius.  Use a thermometer!

Heating the milk - make sure the thermometer doesn't touch the bottom of the pot!

When the milk had come up to temperature, I turned off the heat.  We added honey and vanilla here, because we plan oneating the yogurt straight up and we like a less tangy yogurt.  I whisked the pre-yogurt to combine the honey and vanilla, but also to help cool the mixture.  I also plunged the pot into a sink full of cold water, but missed the photo opportunity.

Whisking

When the mix reached 45 degrees Celsius, we added the yogurt starter and whisked it thoroughly!

Adding the starter yogurt!

When the mixture was smooth, I transferred it to a large measuring cup for easy pouring.  I then filled all the little yogurt vessels that came with our yogurt maker.  This was still a bit messy, so I laid down a cloth.

Filling the yogurt pots

All the little pots got put into the machine uncovered, and then the lid put on the machine.  All the yogurt maker does is incubates the yogurt, since yogurt likes to be nice and warm.  We set the timer for 10 hours, we’ll see how she goes!

Nothing left to do but wait!

A longer incubation will apparently make a firmer, but tangier, yogurt.  I like a firm yogurt, so we might leave it in a little longer.  I’m a little concerned with the amount of vanilla aroma coming off the yogurt – I hope the tangy-ness of the yogurt will balance it out a bit.  We’ll have to see what tomorrow brings!

Comments (4) »